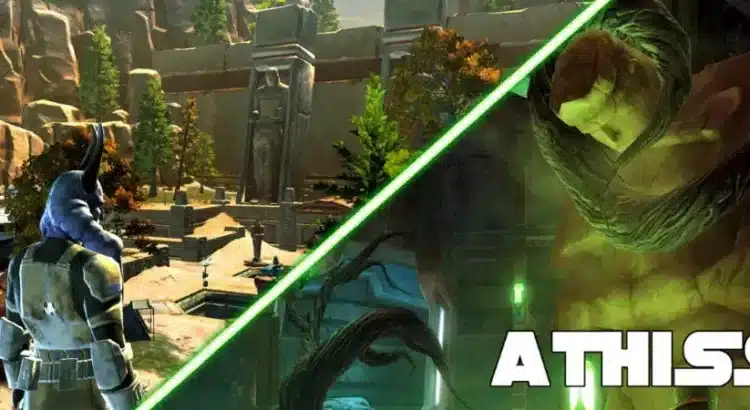
Your team has been called together to travel to the planet Athiss and investigate a distress signal sent back from a Republic survey team. It’s possible that during their dig they uncovered something that should not have been disturbed. After all, this planet used to be the home of an ancient and unstable Sith Lord. Your mission is to discover what they unleashed and put it to rest again.
Out of all the Flashpoints in Star Wars: The Old Republic, Athiss is one of the easiest for both Republic and Empire factions but you still need to be prepared to go up against 3 bosses. You can get the most out this flashpoint if you have an archaeologist and someone with Bioanalysis of 75 or more on your team.
Upon arriving on the planet, this level 20 Flashpoint begins in a valley surrounding by tombs. You’ll hear a message over the comm. form the Republic survey team leader telling you their comm. systems are severely damaged and warning you not to enter the ruins.
Of course, you won’t heed this warning and as you make your way through the excavation site to the elevator shaft, you’ll encounter several groups of excavation droids. Once you make it to the elevator, you’ll need to go down the shaft and there are two ways of doing this.
The easiest way is to have a level 80 Slicer or higher use his skill to reactivate the control panel so you can take the elevator down. Your other option is to drop down the shaft but you have to be careful doing this. You’ll need to land on each platform and heal before going to the next one because you will sustain falling damage. If you miss the platform and hit the bottom, your character dies.
Pack of Explosives
Once your team reaches the bottom, the first thing you need to do is retrieve the Pack of Explosives. These are located to the east and marked on the map. You’ll need them to open up a sealed door later but if you have an archaeologist in your team, you can bypass this step.
The animals guarding the room where the explosives are located will be easy to beat. However, the room is dark so you’ll have to keep a close eye out for the pack. It will be located somewhere on the floor. After retrieving the explosives, go back to the elevator shaft and start making your way to the tomb located to the west.
First Boss: Professor Ley’arsha
Professor Ley’arsha, who is actually a corrupted explorer, is the first boss and you’ll have to fight off several mob groups as you make your way through the tombs. These are easy to kill but there are lots of them. If a member of your groups has Bioanalysis, you can gather up the mobs with gray stars when you encounter them. Once you reach the doors, you can use the explosives to open it. You’ll find the boss and her cronies at the north end of the room. They’re easy to find because they have a reddish glow.
Fighting Ley’arsha is a lot like fighting a Smuggler and the simple tank and spank fight will suffice. Occasionally, she will drop a very big corrosive cloud so stay out of the pink glowing circle. She also uses a cone-shaped AOE frontal attack and you’ll have to deal with the adds she summons and there will be a lot of them.
For this reason, while the tank is focusing on the boss, the rest of your team should be taking them out as they appear. Otherwise, there’ll be so many of them they’ll overwhelm your group. Fortunately, they are easy to kill with CC from any member of your group. After taking down the first boss, grab your loot and head to the red glowing Research Console.
https://youtube.com/watch?v=s-wgBTvgf-4
Research Console
Once you reach the Research Console, you can disable the beacon but you will have a decision to make. Do you try to save the explorers or leave them to die in unbearable torment on this forgotten planet? Activating the beacon is a Light Side decision and it will give them a chance to be rescued but it means they could spread the corruption throughout the galaxy. Destroying the beacon is sure death for the explorers and is a Dark Side decision but it will prevent them from spreading their corruption. You have to make a decision and then move on to the Ruins of Kressh.
Ruins of Kressh
On your way to the ruins, you’ll constantly run into packs of mobs but not much of anything else. However, the player with Bioanalysis can loot Snarlroot along the way that will put Unique Pheromones in your inventory.
Snarlroot is the little blue plants scattered on the ground and they’re highlighted blue on the minimap so they’re easy to find. The Unique Pheromones allow you to summon a small pet companion called Alchemical Snarler. You can also use the snarlroot bulb to make a temporary bio-weapon to use on the tomb-dwellers.
While in the ruins, the Scavengers in the group can repair a battle droid they run across and the Archaeologists can explore the caves and tombs and receive a ten-minute, health-regeneration boost. Eventually, as you explore the Ruins of Kressh, you’ll meet boss number two.
Second Boss: The Beast of Vodal Kressh
The Beast of Vodal Kressh will be a challenge because he’s basically a giant tank with lots of HP. There will be a few armed tomb-dwellers around him and he will summons little snarlers to aid him in the fight, which will try to take down your healer. Your tank should focus on Kressh while the rest of your team takes down the mobs.
This boss has a very strong knockback attack so the tank needs to have him facing the back wall to keep him from killing the rest of the team and the healers and DPS players can attack from the sides. Kressh will also send out waves of Alchemical Tuk’ata. He’ll send out four of these at a time so be ready to take them on out. Once you destroy the Beast of Vodal Kressh, grab his loot and keep going west towards the underground tombs.
Third Boss: Prophet of Vodal
The Prophet of Vodal is the third and final boss but you’ll encounter a lot of Temple Guardians and Disciples along the way. You can bypass some of them if your Archaeologist uses the Ancient Actuator when close to the entrance door.
When you do battle with the Guardians, it’ll be a tank-n-spank battle because they fight like the Sith Warriors. The Disciples fight like the Sith Inquisitors so be ready for a massive amount of lightning attacks headed your way. Use interrupts when you see this AOE attack being used to avoid being wiped out. When you reach the Prophet of Vodal, he’ll be standing alone at the bottom of some stairs.
As soon as you enter, he will issue a challenge stating he will regain the galaxy by taking both your bodies and ship. Vodal has a damage-over-time attack that hits one member of your team. When it expires it will do damage to anyone else who is close to the targeted player. The best way to avoid this attack is to interrupt it when you can. When a player is hit, the healer can try to heal them or that player can get as far away from the group as possible so they won’t take any teammates out with them.
Occasionally, Vodal will disappear. When you see this happen, four fireballs will spawn and target one of your teammates. Before the fireballs appear, the player will be marked by a dark “burst” effect. The only thing that player can do is run around and avoid being hit until they despawn. Once Vodal is taken down, go to the top of the stairs and grab the loot. Look on the mini-map and end the Flashpoint by using the “Exit Area” button.
Don’t forget to check out constantly growing list of guides for Star Wars: The old republic
FAQ for Flashpoint Guide: Athiss in Star Wars: The Old Republic
What is Athiss?
Athiss is a low-to-mid-level Flashpoint in Star Wars: The Old Republic (SWTOR). Set on the ancient Sith world of Athiss, this Flashpoint involves uncovering the secrets of a long-abandoned Sith temple, fighting off various beasts, and preventing a powerful Sith spirit from being released.
What level is required to access Athiss?
Athiss is designed for players around levels 21-26. It can be accessed through the Group Finder, which scales the difficulty to match your level, or directly from the mission terminal on the fleet.
How do I start the Athiss Flashpoint?
To start Athiss:
- Group Finder: Use the Group Finder tool (default key “P”) to queue for Athiss.
- Mission Terminal: Pick up the mission from the Flashpoint terminal located on the fleet.
- Direct Entry: Travel to the entrance on the planet Athiss via your ship’s galaxy map.
What are the main objectives in Athiss?
The primary objectives include:
- Exploring the Temple: Navigate through the ancient Sith temple, defeating enemies and solving puzzles.
- Defeating Key Bosses: Overcome several challenging bosses with unique mechanics.
- Stopping the Ritual: Prevent the release of a powerful Sith spirit by disrupting the ongoing ritual.
Who are the key bosses in Athiss?
- Professor Ley’arsha: An archaeologist corrupted by the dark side, using ranged and Force attacks.
- Tarak Vesh: A powerful Sith sorcerer with devastating Force abilities.
- Ancient Abomination: A monstrous creature guarding the inner sanctum of the temple.
- Sith Entity: The final boss, a powerful Sith spirit that must be contained.
What strategies should be used for the bosses in Athiss?
- Professor Ley’arsha:
- Interrupt her Force abilities to minimize damage.
- Avoid her AoE attacks by spreading out.
- Tarak Vesh:
- Focus on taking down his summoned creatures quickly.
- Interrupt his channeled abilities to reduce incoming damage.
- Ancient Abomination:
- Avoid its frontal cone attacks by positioning yourself behind it.
- Use defensive cooldowns to survive its heavy hits.
- Sith Entity:
- Interrupt its powerful Force abilities to mitigate damage.
- Stay mobile to avoid its AoE attacks and spread out to reduce group damage.
- Use stuns and defensive cooldowns effectively.
Are there any special mechanics to be aware of?
- Puzzles and Traps: Throughout the Flashpoint, players will encounter various puzzles and traps that need to be solved or avoided to progress.
- Environmental Hazards: Be mindful of environmental hazards like fire traps and collapsing structures that can deal significant damage if not avoided.
- Interactive Elements: Use terminals and control panels to disable security systems and open doors.
What are the rewards for completing Athiss?
Completing this Flashpoint rewards players with:
- Experience points.
- Credits.
- Gear appropriate to your level.
- Daily and weekly commendations if completed through the Group Finder.
How can I prepare for Athiss?
- Gear Up: Ensure your gear is up to date for your level and role.
- Medpacs and Stims: Carry medpacs and stims to boost performance in combat.
- Group Coordination: Communicate with your group to effectively manage combat and objectives.
Are there any achievements associated with Athiss?
Yes, completing Athiss can earn you several achievements, including:
- Athiss Conqueror: For defeating all the bosses.
- Athiss Hero: For completing the Flashpoint multiple times.
- Speed Run: For completing the Flashpoint within a certain time limit.
By following this guide and utilizing the mentioned resources, you can effectively navigate and conquer Athiss, ensuring a successful mission and valuable rewards. May the Force be with you!