Allusis, the Republic warship was stolen by a rogue faction of Mandalorian Raiders under the Clan Varad banner. They are attacking and inflicting mayhem on the defenseless Outer Rim worlds. Strike teams have been assembled and sent out to seize control of the Allusis and end these brutal and senseless attacks.
It’s recommended that each member of your team, whether Empire or Republic, be at least a level 25 before undertaking this mission. After choosing your team, prepare to face off with 3 bosses and gain control of that warship.
Upon Arrival
When you first arrive on board the Allusis, you’ll be greeted by a challenge from Mavrix Varad. He will make this announcement using the ships loudspeaker system. “This is the chieftain of Clan Varad. Whoever you are, you’ve challenged the wrong ship.” For now, just ignore him and move on to the first room of the ship.
You’ll encounter several fights that are not a major challenge for a well balance and experience team but they can help you get hyped up for the boss battles. Expect to encounter a few Mandalorians with their defense droids, a few battle droids and some Salky hounds on the ship.
The main thing to remember is that you may encounter these groups within a close proximity of each other so you won’t have a lot of time to regroup from one battle, before going into another one. By paying attention to your positioning, you can avoid pulling in more than one group at a time, which will help.
Broken Medical Droids
Along your way you’ll encounter two medical droids that are broken but don’t pass them by. A Scavenge skilled character of 100 or more can repair them so they can be reactivated. Once reactivated, you can add these Republic Medical Droids to your group, giving you healing companions that won’t be counted against your group size.
Even though they’re not that strong, your healers will find them to be very useful during the boss fights, if you can keep them together long enough. In the meantime, they can also help make the other fights go faster.
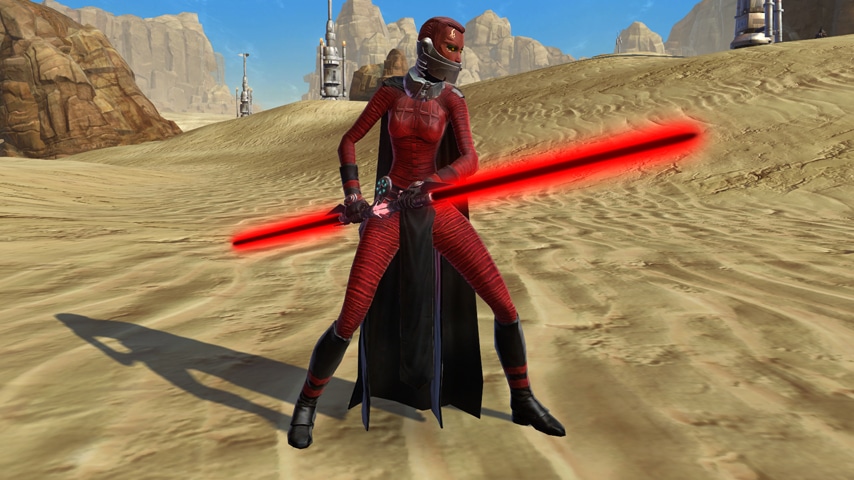
First Boss: Braxx the Bloodhound
The very first boss that you’ll encounter on the Allusis is Braxx the Bloodhound. He will have two companions, which are Sanguine Salky Hounds, so expect this fight to be a hard one. Braxx has an AOE melee damage attack that continues to do damage over time. This can inflict some serious damage to your team.
Taunts and CCs won’t have any effect on The Salky hounds but what’s worse is that they seem to enjoy chewing up your healers. For this reason, you’ll need to get rid of them as quickly as possible while protecting your healers. Have your tank hold agro on the boss and one of the hounds. During this time, the DPS needs to burn the other one as fast as he can and then focus on the one being held by agro.
When fighting the hounds, you need them take them down fast while keeping them moving around. This boss has aura, which will give them buffs that increases the amount of damage they can do. It’s much better for your team if you can fight them outside of the aura.
After taking down the hounds, your team can put all of their attention on Braxx. Use taunts on him and all of your melee fighters need to avoid his Cleave attack. When he sends out this AOE, a large red circle will appear. When you see it, move to the outside of the circle, then at the end of attack, you can move in on him again.
As soon as you defeat this boss, you’ll get another message from Mavrix Varad saying, “You’re good, but you’re not Mandalorians. The harder you hit us, the tougher we get!”
This fight has the potential to drop two items, which are the Clan Varad Recon Greaves and Clan Varad Watcher’s Jacket, so look for these before moving on just in case.
The Rocket Tram
On your way to the second boss fight, you’ll need to endure several fights as your team makes their way to a rocket tram that will take you to the ship’s cargo deck. This is a big room full of droids and two defense turrets. If for some reason the tram passes you by, just run through the tunnel but watch out for the tram as it shoots back from the cargo deck.
Once you do arrive, take down the turrets first. Then, look underneath the shipping containers stacked in the pit on the left and you’ll find a security chest. After several more simple fights, you’ll come to an elevator that leads to boss number two.
At this point, you’ll see a billboard pop up. It will read “The Republic fleet has joined the battle!” but this really doesn’t affect you because Varad will send out his goons to fight them.
Next, you’ll hear “Battle Team Royal! Get in position! Cut down that scum!” and you’ll see Team Royal located at the end of the corridor. However, an explosion caused by the Boarding Party of the second boss breaching the hull will take them out before they have a chance to attack. The Boarding Party will then take their place.
Second Boss: Republic Boarding Party
At first, you may think this boss fight will be a breeze because you’ll encounter two ranged opponents with blasters and two melees yielding lightsabers. However, you will soon see that this is going to be much harder than you thought. In fact, it may be the hardest boss fight in the game because when you take one down, the others get stronger.
The best way to win this battle is by taking out the opponent holding a dual-saber first. He can leap around almost constantly while resetting his threat tables but your tank can get back agro in-between some of the leaps. Protect your healer from him as much as possible and take him out fast.
Next, concentrate on burning the other opponents until they fall somewhere between the 10 and 20 percent health mark, then take them out quickly. This boss team will take a toll on your healers, so you have to work fast. Everyone in your group should know which order to follow so you’re working on the same target at the same time.
By locking the enemy down and fighting each one individually, you can wipe them out quickly, making it possible for your team to make it through the battle. However, you do need to watch out for area attacks when using lots of CC in this battle.
After the fight, you have the potential to receive the Lower Robe of Dark Delirium item drop and of course, Varad has another message for you, which says, “At least that idiotic peace treaty hasn’t made you soft. This might be a decent fight after all!”
Launch Control Deck
Now, you’re ready to take the lift and head on over where you’ll find a launch control deck. During the first stop about half way down, you’ll see a bridge that connects two platforms. There will be a group of Mandalorians on your right. Fight them and then access the hidden loot chest, which will be to the left of the bridge. Now, you’re ready to continue on to the third boss.
When you see the emergency console that’s glowing, use it to open the doors to the next stage. Here, you’ll meet some of Varad’s Mandalorian engineers. You’ll have to decide if you want to take care of them using the “Light Side” or the “Dark Side” option. You’ll then receive one last challenge from Varad, which says “Your little adventure is about to end. Come on — I’m waiting for you!”
Third Boss: Mavrix Varad
On your way to the square room where you’ll encounter Mavrix Varad, you’ll go past two defense turrets. You’ll find that this battle is not as difficult as the last one but you do need to be alert. Varad is a bounty hunter, which means he is a mobile-ranged fighter. When his health reaches a certain threshold, he will use his jetpack to go to a corner of the room where he will acquire assistance in the fight by activating two turrets. When he does this, your team needs to focus on them, take them out as quickly as possible and then jump back on Varad.
He will repeat this action twice more during the battle so if you don’t take out the turrets as they appear, you’ll be fighting four or six turrets and Varad at the same time. Once all the turrets have been activated and destroyed by your team, Varad will make a final stand in the middle of the room where you can take him down.
Don’t forget to check out constantly growing list of guides for Star Wars: The old republic
FAQ for Flashpoint Guide: Mandalorian Raiders in Star Wars: The Old Republic
What is Mandalorian Raiders?
Mandalorian Raiders is a mid-level Flashpoint in Star Wars: The Old Republic (SWTOR). This Flashpoint involves boarding and fighting through a hijacked Republic vessel that has been taken over by Mandalorian raiders. The players must defeat the Mandalorians and reclaim the ship.
What level is required to access Mandalorian Raiders?
Mandalorian Raiders is designed for players around levels 25-30. It can be accessed through the Group Finder, which scales the difficulty to match your level, or directly from the mission terminal on the fleet.
How do I start the Mandalorian Raiders Flashpoint?
To start Mandalorian Raiders:
- Group Finder: Use the Group Finder tool (default key “P”) to queue for Mandalorian Raiders.
- Mission Terminal: Pick up the mission from the Flashpoint terminal located on the fleet.
- Direct Entry: Travel to the entrance on the fleet and board the vessel that takes you to Mandalorian Raiders.
What are the main objectives in Mandalorian Raiders?
The primary objectives include:
- Infiltrating the Vessel: Gain access to the hijacked Republic vessel by defeating initial guards and security measures.
- Overcoming Defenses: Fight through waves of Mandalorian raiders and automated systems.
- Defeating Key Bosses: Face several challenging bosses with unique mechanics.
- Reclaiming the Ship: Secure key areas of the ship and defeat the Mandalorian leader to reclaim the vessel.
Who are the key bosses in Mandalorian Raiders?
- Braxx the Bloodhound: A Mandalorian with powerful melee attacks and a hound companion.
- Boarding Party: A group of Mandalorians with coordinated attacks.
- Mavrix Varad: A Mandalorian commander with strong ranged attacks.
- Kyrak and Genara: A pair of Mandalorians with complementary abilities, posing a significant challenge.
What strategies should be used for the bosses in Mandalorian Raiders?
- Braxx the Bloodhound:
- Focus on taking down the hound first to reduce incoming damage.
- Avoid Braxx’s melee attacks by kiting him around the room.
- Boarding Party:
- Focus on taking down one enemy at a time to reduce the overall damage.
- Use crowd control abilities to manage the group’s abilities and attacks.
- Mavrix Varad:
- Interrupt his powerful ranged attacks to minimize damage.
- Stay mobile to avoid his AoE attacks.
- Kyrak and Genara:
- Focus fire on one boss to reduce the fight’s difficulty quickly.
- Be aware of their complementary abilities and use stuns and interrupts effectively.
Are there any special mechanics to be aware of?
- Environmental Hazards: Be mindful of traps and environmental hazards that can deal significant damage if not avoided.
- Turrets and Security Droids: Throughout the Flashpoint, players will encounter automated defenses that need to be disabled or destroyed to progress.
What are the rewards for completing Mandalorian Raiders?
Completing this Flashpoint rewards players with:
- Experience points.
- Credits.
- Gear appropriate to your level.
- Daily and weekly commendations if completed through the Group Finder.
How can I prepare for Mandalorian Raiders?
- Gear Up: Ensure your gear is up to date for your level and role.
- Medpacs and Stims: Carry medpacs and stims to boost performance in combat.
- Group Coordination: Communicate with your group to effectively manage combat and objectives.
Are there any achievements associated with Mandalorian Raiders?
Yes, completing Mandalorian Raiders can earn you several achievements, including:
- Mandalorian Raiders Conqueror: For defeating all the bosses.
- Mandalorian Raiders Hero: For completing the Flashpoint multiple times.
- Speed Run: For completing the Flashpoint within a certain time limit.